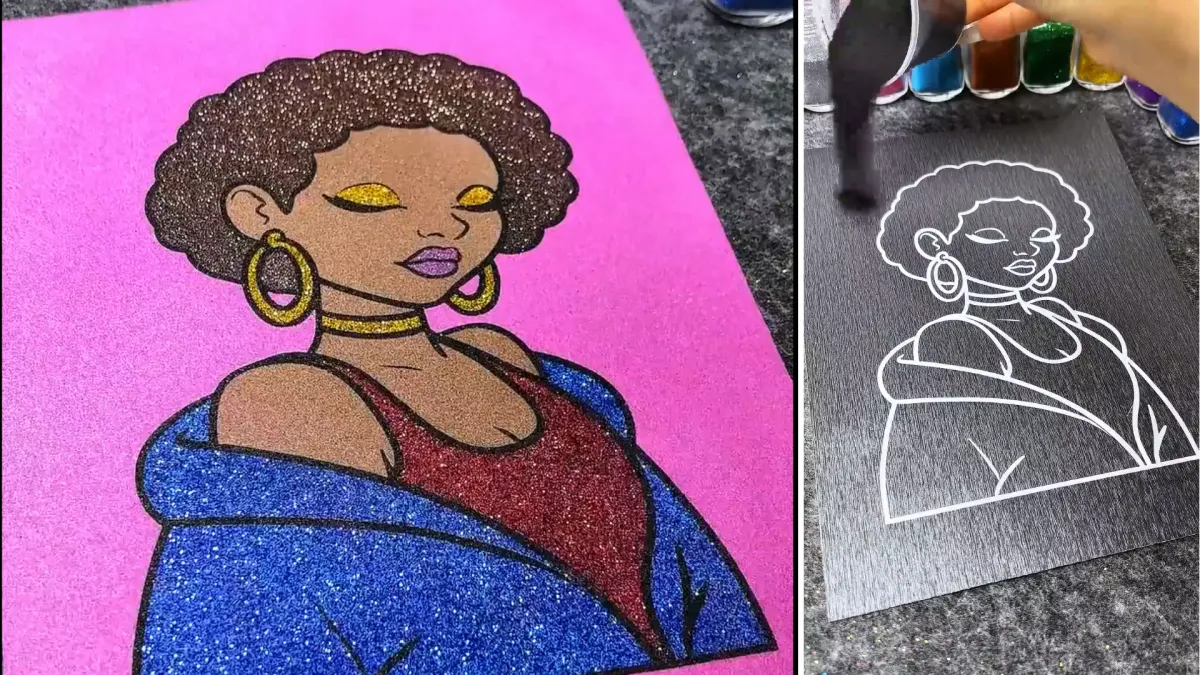
Glitter art has become one of the internet's most mesmerizing craft trends, transforming simple illustrations into eye-catching works of art with nothing more than adhesive surfaces and colorful glitter. While the finished piece may look complicated, the process is surprisingly straightforward when broken down into a series of carefully planned steps.
This glitter portrait project demonstrates how layers of color, texture, and sparkle can turn a basic outline into a vibrant artwork that stands out on any wall. Here's a closer look at how the transformation happens.
Read More
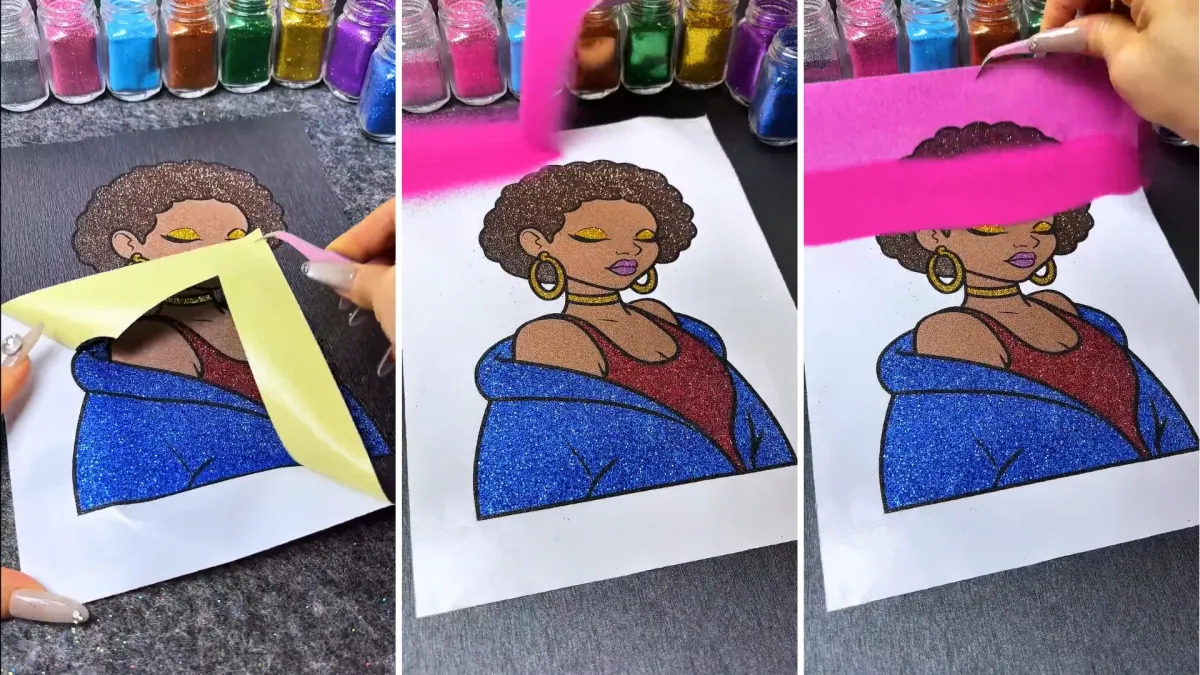
Step 1: Creating the Background
The process begins by peeling away the protective layer covering the background area of the design. Once the adhesive surface is exposed, bright pink glitter is evenly distributed across the open section.
The goal is to create a smooth, consistent background that will frame the portrait and provide contrast for the details that come later.
Pro Tip: Use a small spoon or scraper to spread the glitter evenly and collect excess material for reuse.
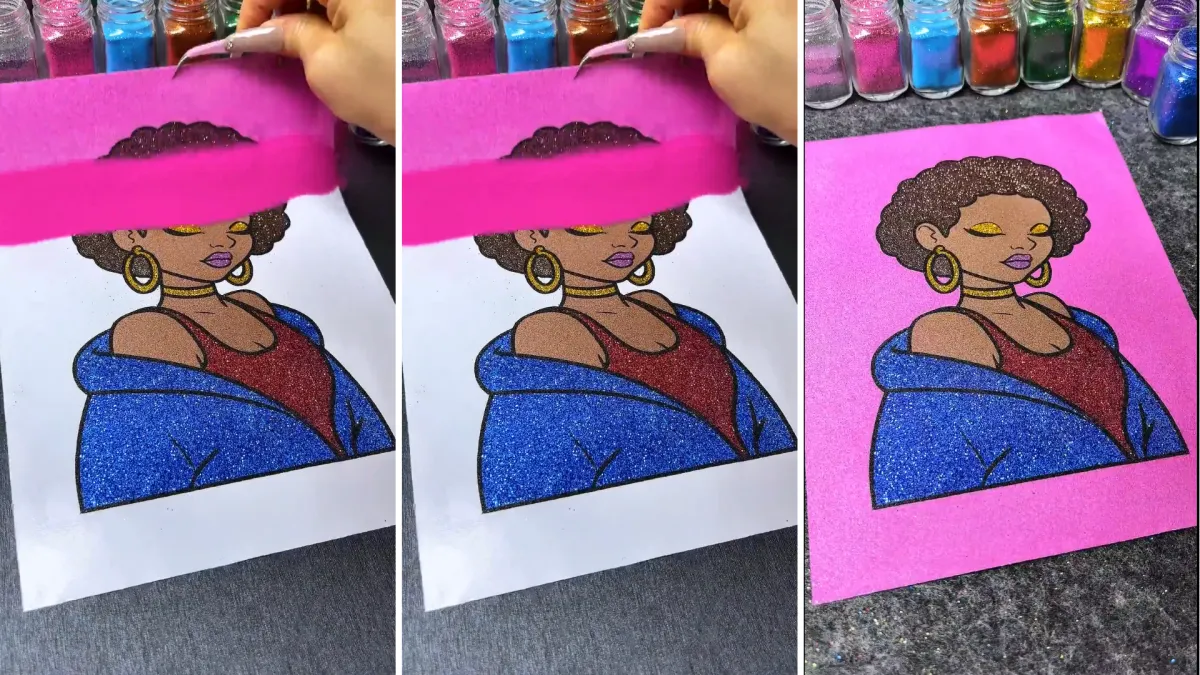
Step 2: Smoothing and Finishing the Background
After the glitter is applied, it is gently pressed and spread across the adhesive surface to ensure complete coverage. Any excess glitter is removed, revealing a clean and vibrant pink backdrop.
A properly finished background helps every other color stand out and gives the artwork a polished appearance.
Pro Tip: Taking extra time during this stage can dramatically improve the overall quality of the finished piece.
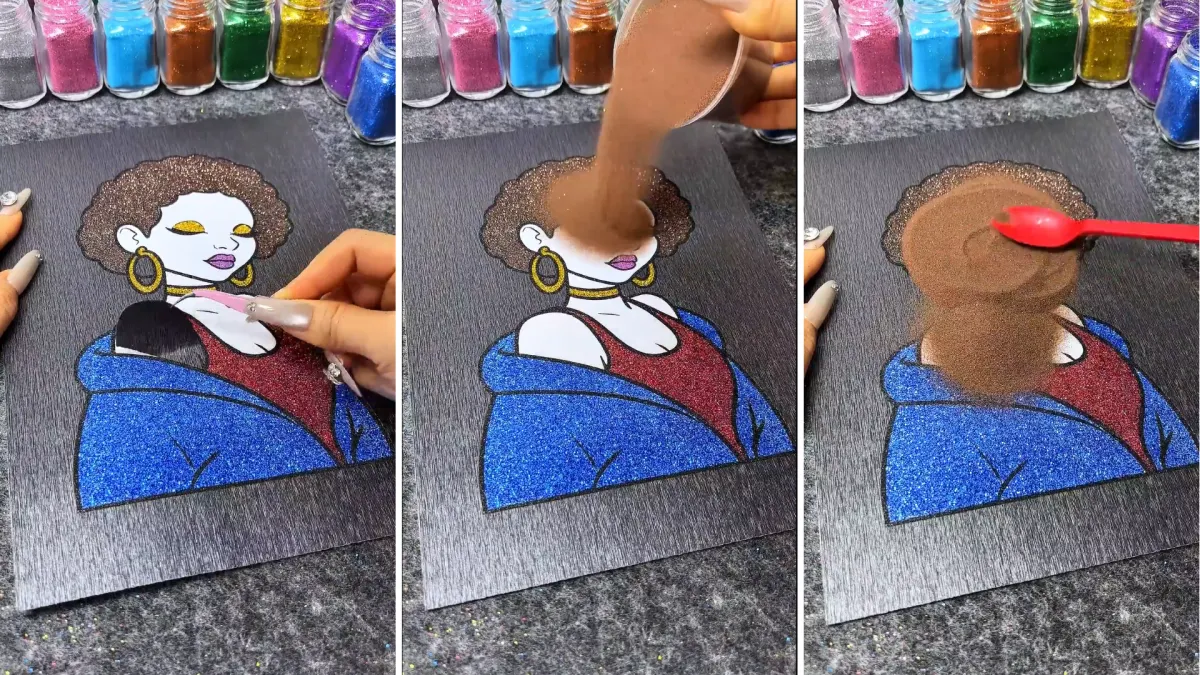
Step 3: Adding Texture to the Hair
With the background complete, attention shifts to the hair. The protective layer covering the hair section is removed, and brown glitter is carefully poured over the exposed adhesive.
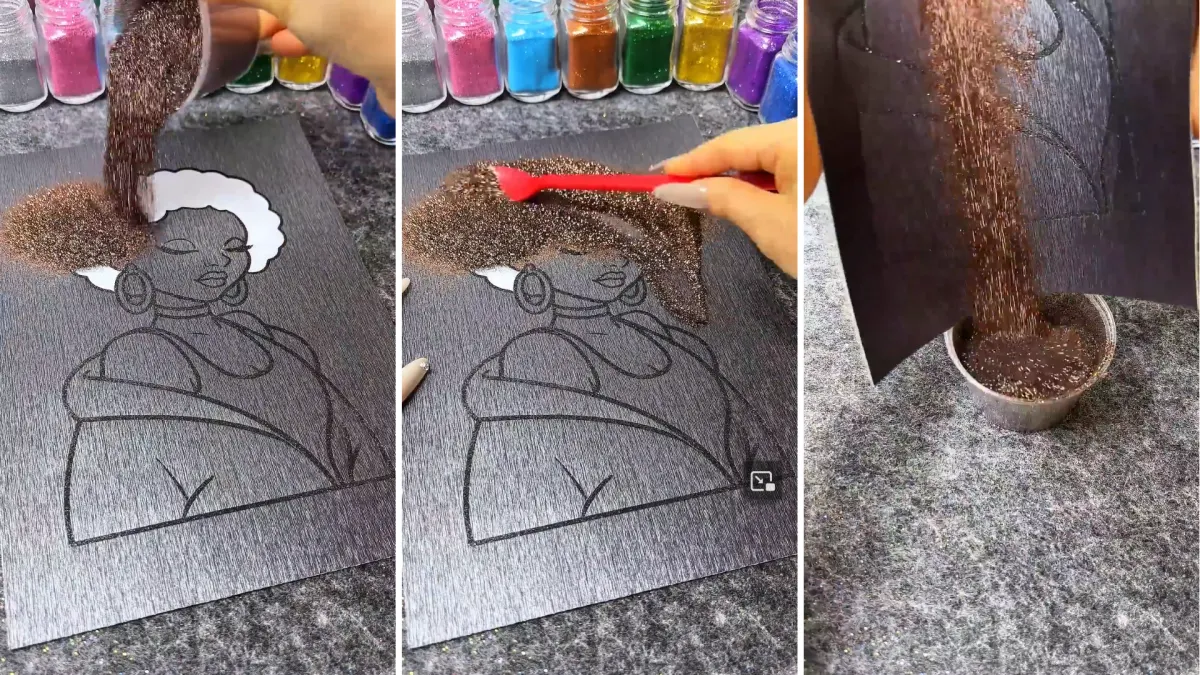
As the glitter settles into place, the textured curls begin to take shape, adding depth and dimension to the portrait.
Pro Tip: Fine-grain glitter works especially well for detailed sections because it preserves the lines and contours of the design.
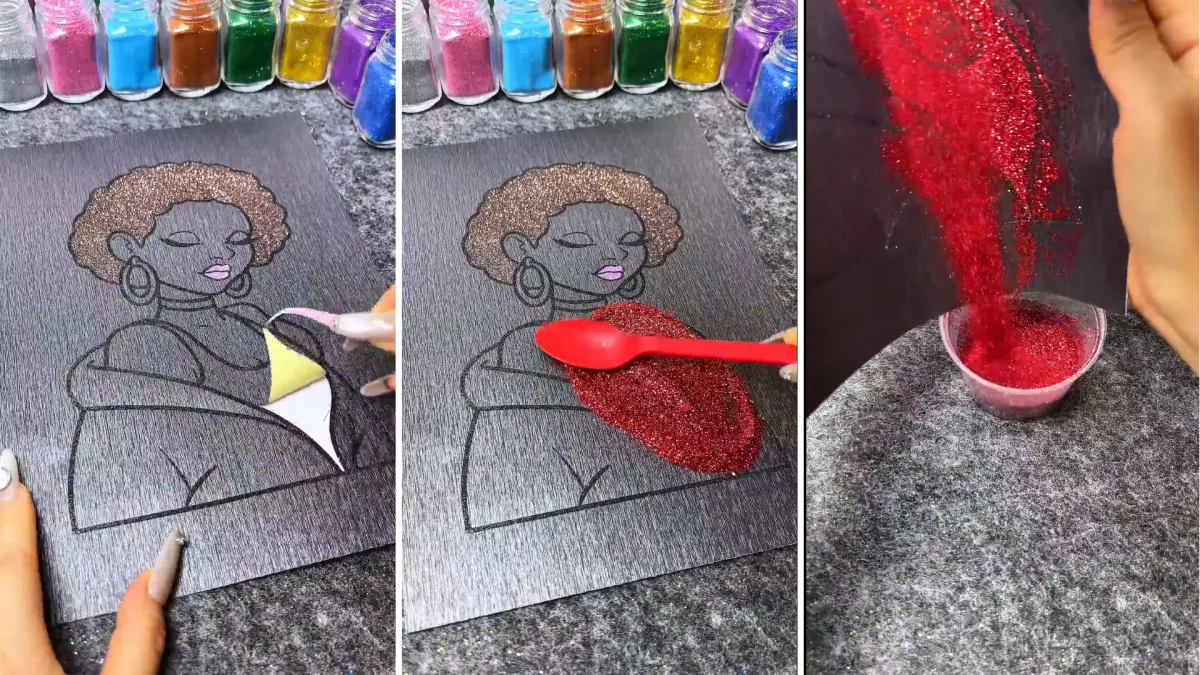
Step 4: Filling in the Skin and Clothing
Next, the artist reveals sections of the skin and clothing one at a time. Different glitter colors are applied separately to maintain crisp edges and prevent unwanted color mixing.
At this stage, the portrait starts to gain personality as the major visual elements come together.
Pro Tip: Working on one color zone at a time makes it easier to maintain clean borders throughout the artwork.
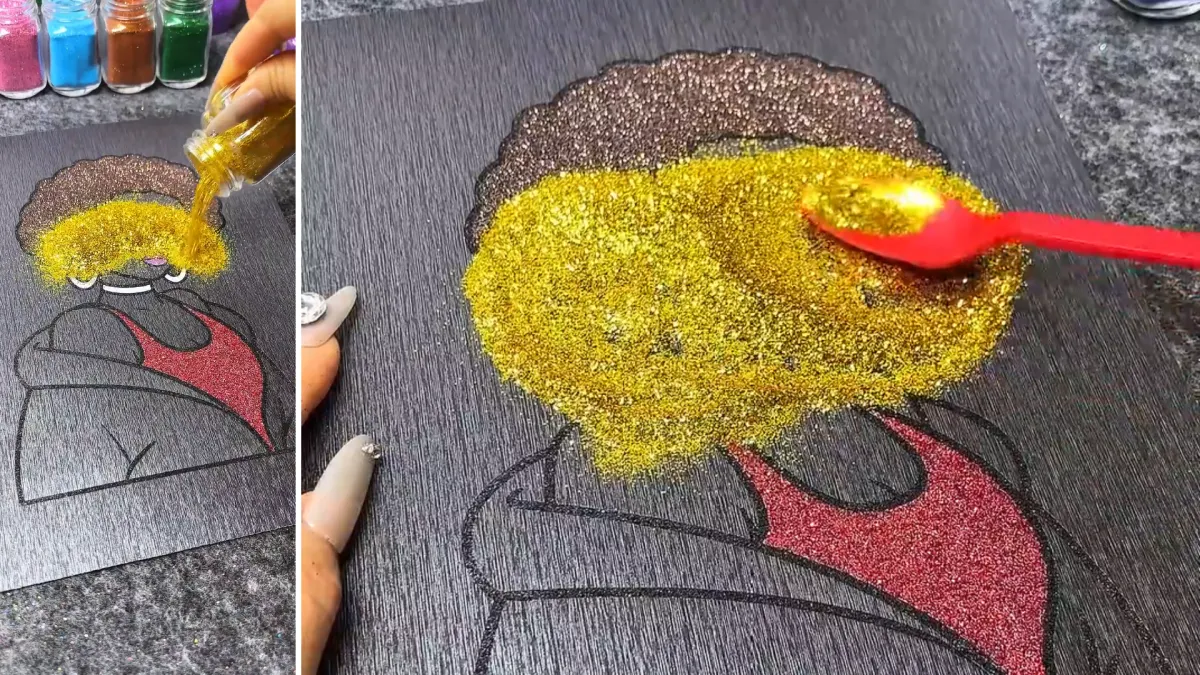
Step 5: Highlighting the Details With Gold
Small details often make the biggest impact. Gold glitter is used to fill the eyes, earrings, necklace, and other decorative elements, instantly adding a luxurious look to the portrait.
These highlights naturally draw attention to the focal points of the artwork.
Pro Tip: Metallic glitter is most effective when used sparingly in key areas rather than across large surfaces.
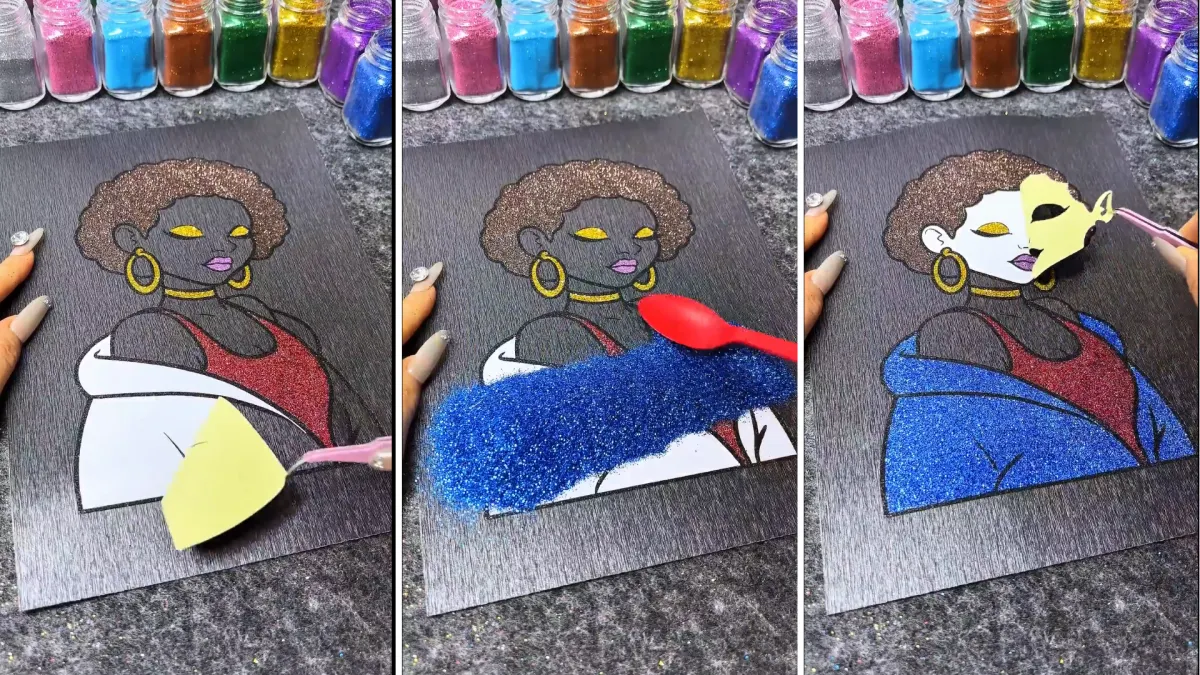
Step 6: Completing the Outfit
The dress is covered with rich red glitter, creating a bold contrast against the blue outer garment and gold accents. The combination of colors gives the portrait a vibrant and energetic appearance.
With each new layer, the image becomes more dynamic and visually striking.
Pro Tip: Circular spreading motions can help achieve a more uniform glitter finish across larger sections.
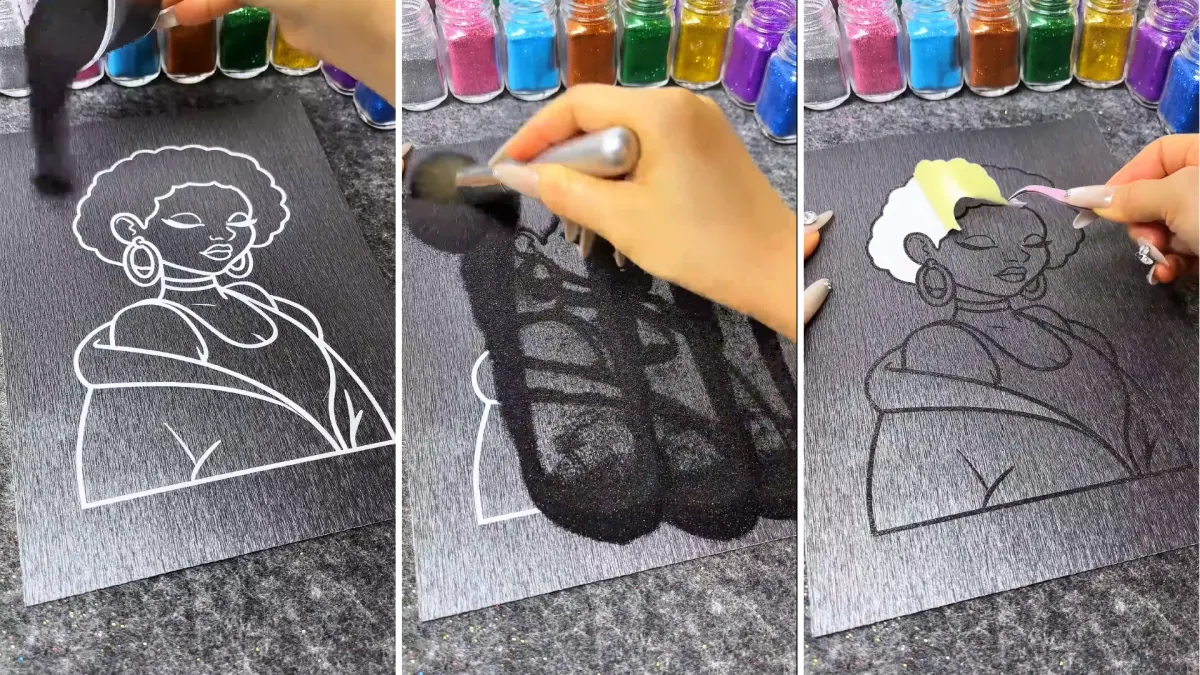
Step 7: Building Contrast on a Black Canvas
To create a dramatic visual effect, the same design is recreated on a black background. The dark surface increases contrast and makes the glitter appear brighter and more reflective.
This approach is particularly popular in decorative wall art because it enhances depth and visual impact.
Pro Tip: Dark backgrounds often make metallic and glitter finishes appear more vivid and three-dimensional.
Step 8: Revealing the Finished Artwork
The final step involves removing any remaining excess glitter and checking the design for consistency. What began as a simple outline is now a vibrant portrait featuring shimmering gold, blue, red, and brown details.
The result is a striking piece of glitter art that combines color, texture, and sparkle in a way that captures attention immediately.
Pro Tip: A clear craft sealant can help preserve the glitter and protect the artwork from shedding over time.
Why Glitter Art Continues to Go Viral
Glitter art combines creativity with satisfying visual transformations, making it especially popular on platforms like Instagram, Pinterest, TikTok, and YouTube Shorts. Viewers enjoy watching blank surfaces gradually evolve into colorful masterpieces, while artists appreciate the accessibility of the technique.
Whether you're creating decorative wall art, handmade gifts, or social media content, glitter painting offers an affordable and rewarding way to express creativity.
Benefits of Glitter Art
- Beginner-friendly and easy to learn
- Affordable materials and supplies
- Endless color combinations
- Highly engaging for social media audiences
- Suitable for both children and adults
- Creates visually striking decorative pieces