

How to Tie a Windsor Knot: Step-by-Step Guide to the Perfect Tie Knot
A Full Windsor Knot, also known as the Double Windsor, is one of the most elegant and professional tie knots you can wear. Its wide, symmetrical triangular shape makes it ideal for business meetings, weddings, formal events, and job interviews. Although it may look complicated at first, learning the Windsor knot is surprisingly simple when broken down into clear steps.
In this guide, you'll learn exactly how to tie a Windsor knot with easy-to-follow instructions.
What Is a Full Windsor Knot?
The Full Windsor is a thick, balanced tie knot that works best with spread or cutaway collars. Because of its symmetrical appearance, it's considered one of the most stylish and formal ways to wear a necktie.

Best for:
- Business attire
- Weddings
- Formal occasions
- Job interviews
- Wide-collar dress shirts
Step 1: Position the Tie Correctly
Begin by lifting your shirt collar and placing the tie around your neck. If you're right-handed:
- Hold the wide end in your right hand.
- Hold the narrow end in your left hand.
Allow the wide end to hang significantly lower than the narrow end. The longer the wide end starts, the lower the finished tie will sit on your chest.

Step 2: Cross the Wide End Over the Narrow End
Cross the wide end over the narrow end, creating an "X" just below your collar.Leave roughly 4 inches (10 cm) of the narrow end visible below the crossing point.This creates the foundation for the Windsor knot.

Step 3: Bring the Wide End Up Through the Neck Loop
Take the wide end behind the loop around your neck and pull it upward through the opening.Pull it completely through until the tie lies flat.This forms the first wrap of the knot.

Step 4: Wrap Around the Back
Guide the wide end behind the knot toward the opposite side.At this stage, the back side of the tie should briefly face outward.Keep the fabric smooth to avoid wrinkles.
Step 5: Bring the Wide End Down Through the Front
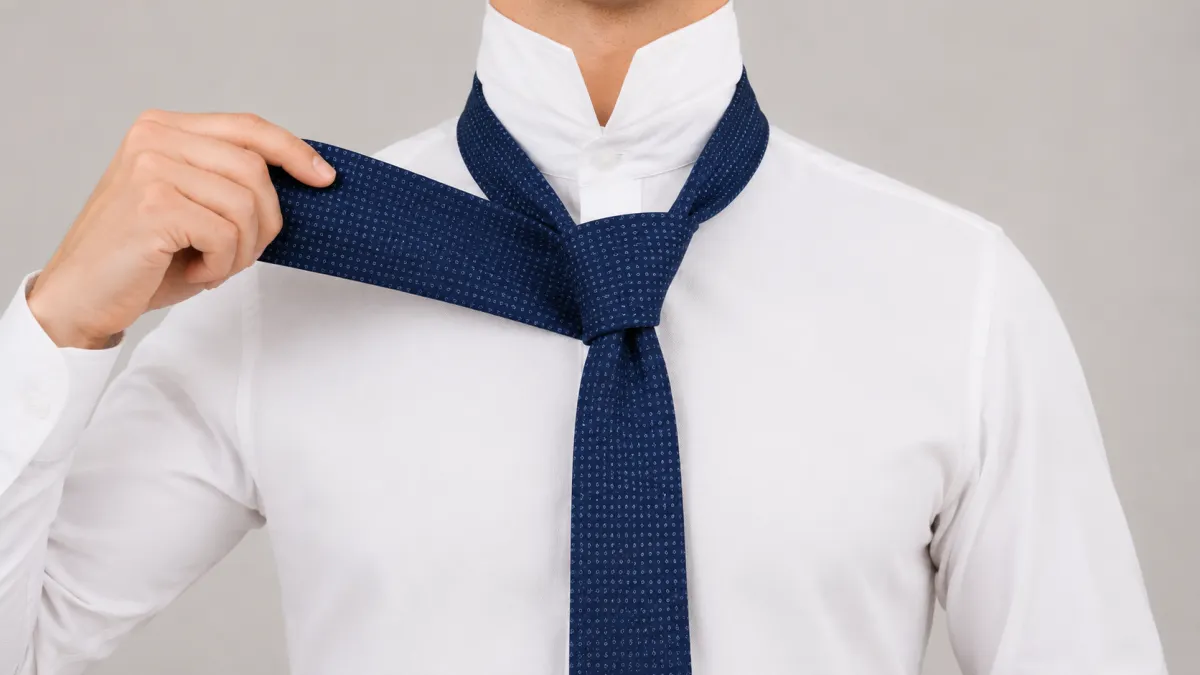
Now pass the wide end through the neck loop again—but this time from the front.Pull it downward completely.The basic structure of the Windsor knot is now complete.
Step 6: Create the Front Wrap
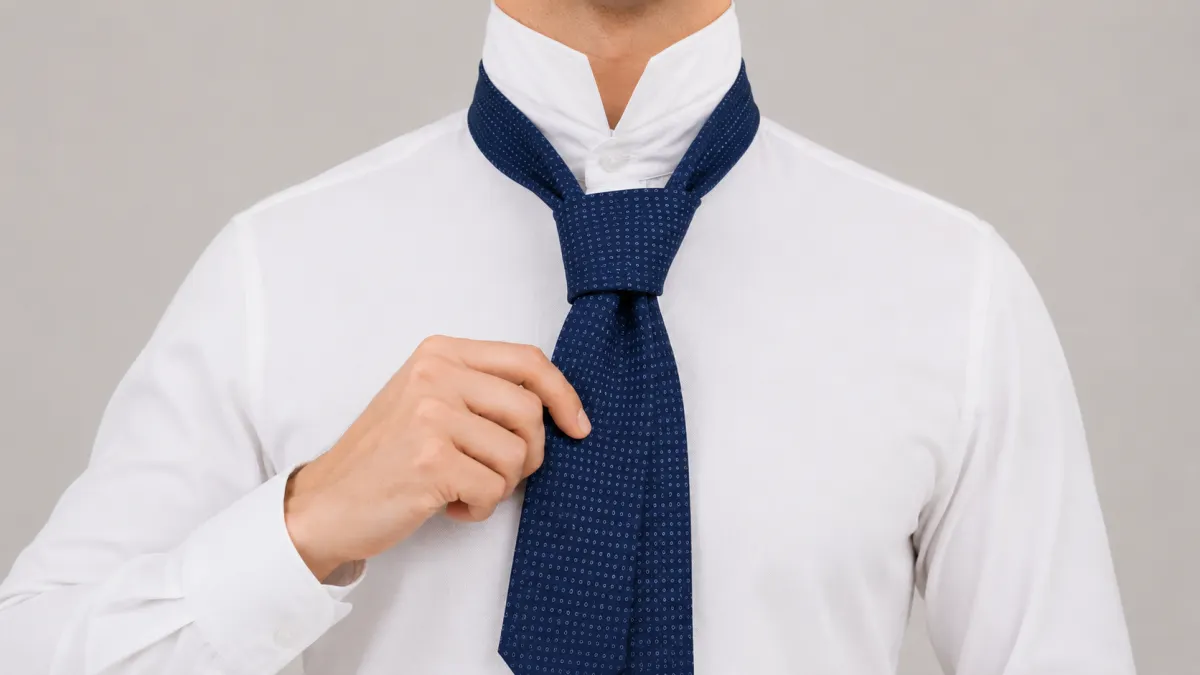
Notice that the knot now resembles a small triangle.Place your left index finger across the front of the knot.Wrap the wide end horizontally around the front of the knot from right to left.Your finger creates a small tunnel that will be used in the next step.
Step 7: Pass the Wide End Through the Neck Loop Again
Bring the wide end behind the knot and pass it upward through the neck loop one final time.Pull it through gently while keeping the tunnel open with your finger.
Step 8: Feed the Tie Through the Front Loop
Insert the wide end downward through the tunnel created by your finger.Pull it all the way through.This locks the Windsor knot into its classic symmetrical shape.
Step 9: Tighten and Shape the Knot
Gradually tighten the knot by alternating between pulling the wide end and the narrow end.Slide the knot upward toward your collar while shaping it into a clean, symmetrical triangle.Avoid pulling too hard, as gentle adjustments create a smoother finish.
Step 10: Finish the Look
Fold your shirt collar back down and make any final adjustments.Your tie should sit comfortably at the collar with the tip ending near your belt buckle.Congratulations—you've successfully tied a Full Windsor Knot.
Tips for the Perfect Windsor Knot
- Start with the wide end lower than you think you'll need.
- Smooth the fabric after every wrap.
- Practice slowly until the movements become natural.
- Pair the Windsor knot with spread-collar shirts for the best appearance.
- Ensure the finished tie reaches the middle of your belt buckle.
Is the Windsor knot difficult to tie?
Not really. While it uses more steps than a Four-in-Hand knot, most people can master it after a few practice sessions.
When should I wear a Windsor knot?
It's ideal for weddings, business meetings, interviews, presentations, and other formal occasions.
What shirts work best with a Windsor knot?
Spread-collar and cutaway-collar dress shirts complement the larger, symmetrical shape of the Windsor knot.
Why is my tie too short?
The wide end likely started too high. Begin with the wide end hanging lower around your neck before tying.
 Alex Mandela 07 July 2026
 Help us keep GotFort ad-free and accessible to everyone. Your contribution supports independent content, research, and publishing.